How to Add a Favicon
When you visit a website, you may have noticed a small icon that appears in your browser tab, next to the website's title. This tiny yet essential element is known as a favicon. Favicons are a fundamental part of web branding and user experience. They not only make your website look more professional but also help users identify and remember your site. In this comprehensive guide, we will walk you through the process of uploading a favicon to your website, explaining its importance, and providing step-by-step instructions.
A favicon, short for "favorite icon," is a small, square image or icon that represents a website. It appears in various places, such as browser tabs, bookmark lists, browser history, search results and address bar. Favicons serve as a visual cue, helping users quickly identify and locate your website among their open tabs and bookmarks. They are typically in the ICO file format and measure 16x16 pixels, although larger sizes like 32x32 pixels are becoming more common.
Favicons offer several benefits for your website, branding being the main one. A well-designed favicon reinforces your brand identity. It's a tiny but significant part of your visual branding. Favicons make your site stand out in a sea of tabs. Users can easily spot and return to your website. A missing or default favicon can make your site appear incomplete or unprofessional. When users have multiple tabs open, a favicon provides a visual reference, improving overall user experience. For more information, visit the Favicon Generator.
The first step for adding a favicon to your website is to design one. There are a few factors to keep in mind when designing your image. Firstly, remember that your favicon is going to be a square. This means your aspect ratio (1:1) should reflect that in your original image. Secondly, you should keep in mind that your image is going to be scaled down significantly, so try to keep your designs simple and not overcomplicated. Lastly, browser tabs usually have a background color which means that your logo should be transparent.
After designing your image, you now need to scale it to the appropriate size and reformat it. To do so, go to the Favicon Generator and convert your image into a favicon. Simply upload your image and when it's complete download your favicon.ico file. Remember to copy the code provided because it is required in a later step.
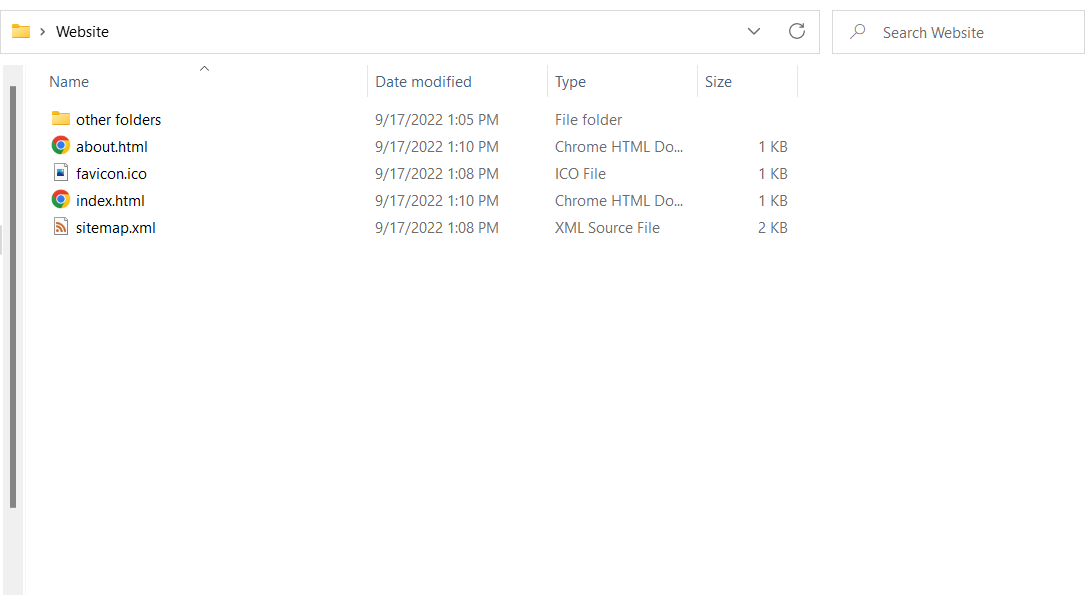
Next, you need to add your favicon to your website's folder. To do this, take your favicon.ico file and add it to the root level of your folder. Your folder structure should look similar to that in the image below. If done correctly, you should be able to go to <your_website_name>/favicon.ico and find the file there. If you do not see your favicon when you go to the link, make sure you placed it at the root level and not inside another folder.

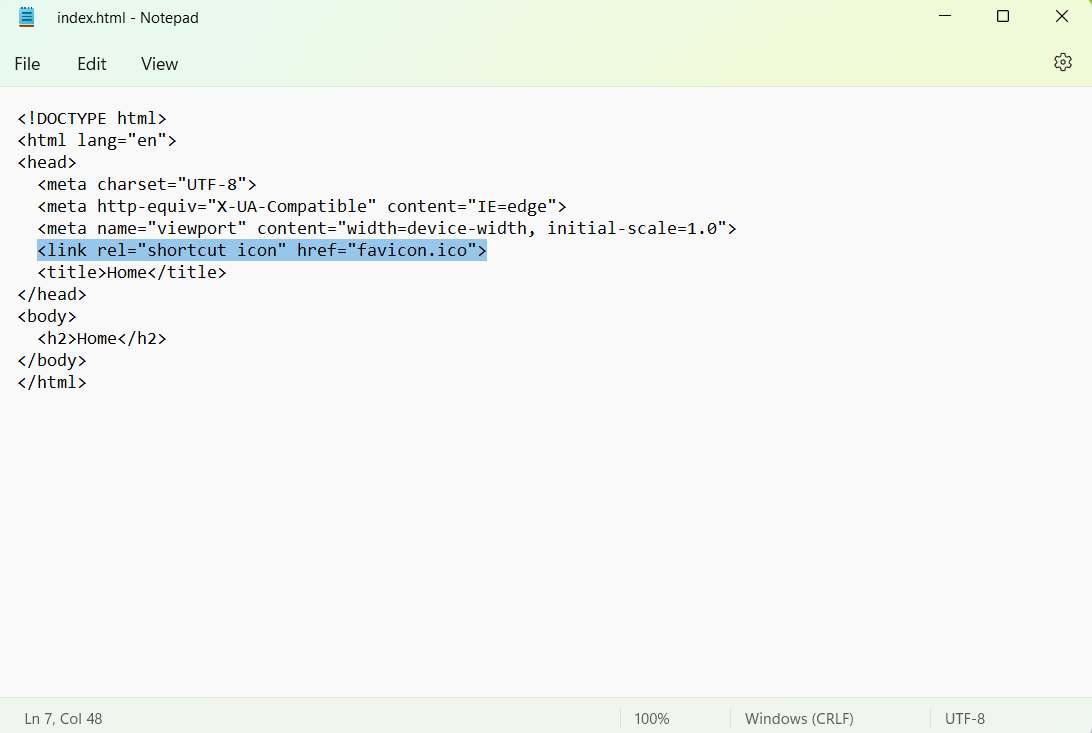
Now that you have added your favicon to your website folder, you need to add the code to each file. The code is provided for you when you generate a favicon and is available in the example below:
<link rel="shortcut icon" href="favicon.ico">
Keep in mind that the above line of code must be added inside the <head> tag of each webpage. Use the image below as a guide for your web pages.

Finally, it is important to note that when adding your favicon to pages that are not in the root directory of your website, you will have to change the src attribute. This is because relative links change based on which folder they are in. If you were to add the code to index.html, src="favicon.ico". On the other hand, adding it to some_folder/file.html, src="../favicon.ico". The entire line of code remains the same but the number of backslashes ("../") before "favicon.ico" changes depending on how deep your page is nested.
Based on the number of directories your file is in you will be required to add that same number of "../". In the example above, file.html is in only one folder, some_folder, which is why we only added one "../". Nevertheless, if you have completed all steps properly your favicon will be visible on all pages.

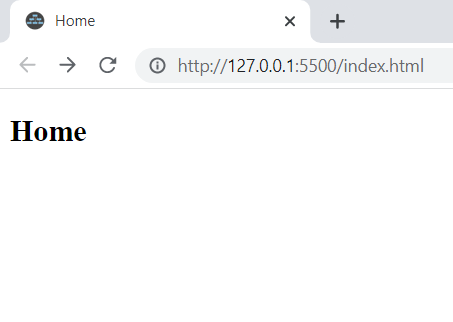
If you have completed all the steps above and your favicon is still not visible, there are a few troubleshooting steps you can follow. The most common reason for a favicon not appearing is the browser's cache. A browser caches images to speed up load times for your site. This can cause your favicon to not be visible because your browser is not showing you the newest file. Fortunately, fixing this issue is very easy. Pressing Ctrl and clicking the reload button should fix it. If that doesn't work, try clearing your browser's cache and that issue should be fixed.
If your favicon is visible on some pages and not others. The problem is most likely in the "src" attribute of the favicon's "link" tag. Review the final step and ensure that "../" is repeated appropriately according to the number of directories your file is nested in.